Saturday, December 19, 2015

Pebble Battles

I was hoping to get allot of programming done on my Pebble yesterday.  Not so.


I left off Thursday with a working app, started up Friday morning to this.  It's telling me that pebble.h doesn't exist.  Sort of a fundamental problem.  So I scour the internets to see what's going on, nothing.  Send an email to support, then consider my options.

The last time CouldPebble was down I developed on my Mac, so back to that.  Fumble around for a while, it's been almost a year.  Load app on my watch, mistakenly putting it on the one I'm wearing, and not the development model...  App doesn't work.  Try to load onto my original pebble, just get this message "Couldn't install app".  Dead.  Nothing.  Try app in emulator, works fine.

After an hour or two of this, I notice that pebble is on a new SDK release.  Start fiddling around with the command line:
->pebble sdk list

Tells me I'm on 3.8.1.   Hmm, lets try 3.7.
->pebble sdk install 3.7
->pebble activate 3.7

I like the way you can easily switch and install SDK's, beats the hell out of Java and hunting around for the correct version.
Then build, install and success!  Most of my day is gone, but the watches are back to working.
As of today, CloudPebble is still wasted.  I really liked this tool, and the mbed site as well, good for casual use I suppose.  Looks like I'm officially done with CloudPebble for development.

Thursday, December 17, 2015

Working Prototype

Bread boarded and working.
Now to get this on a PCB, and figure out what kind of battery I'm going to need.


Final build:
- BLE Nano
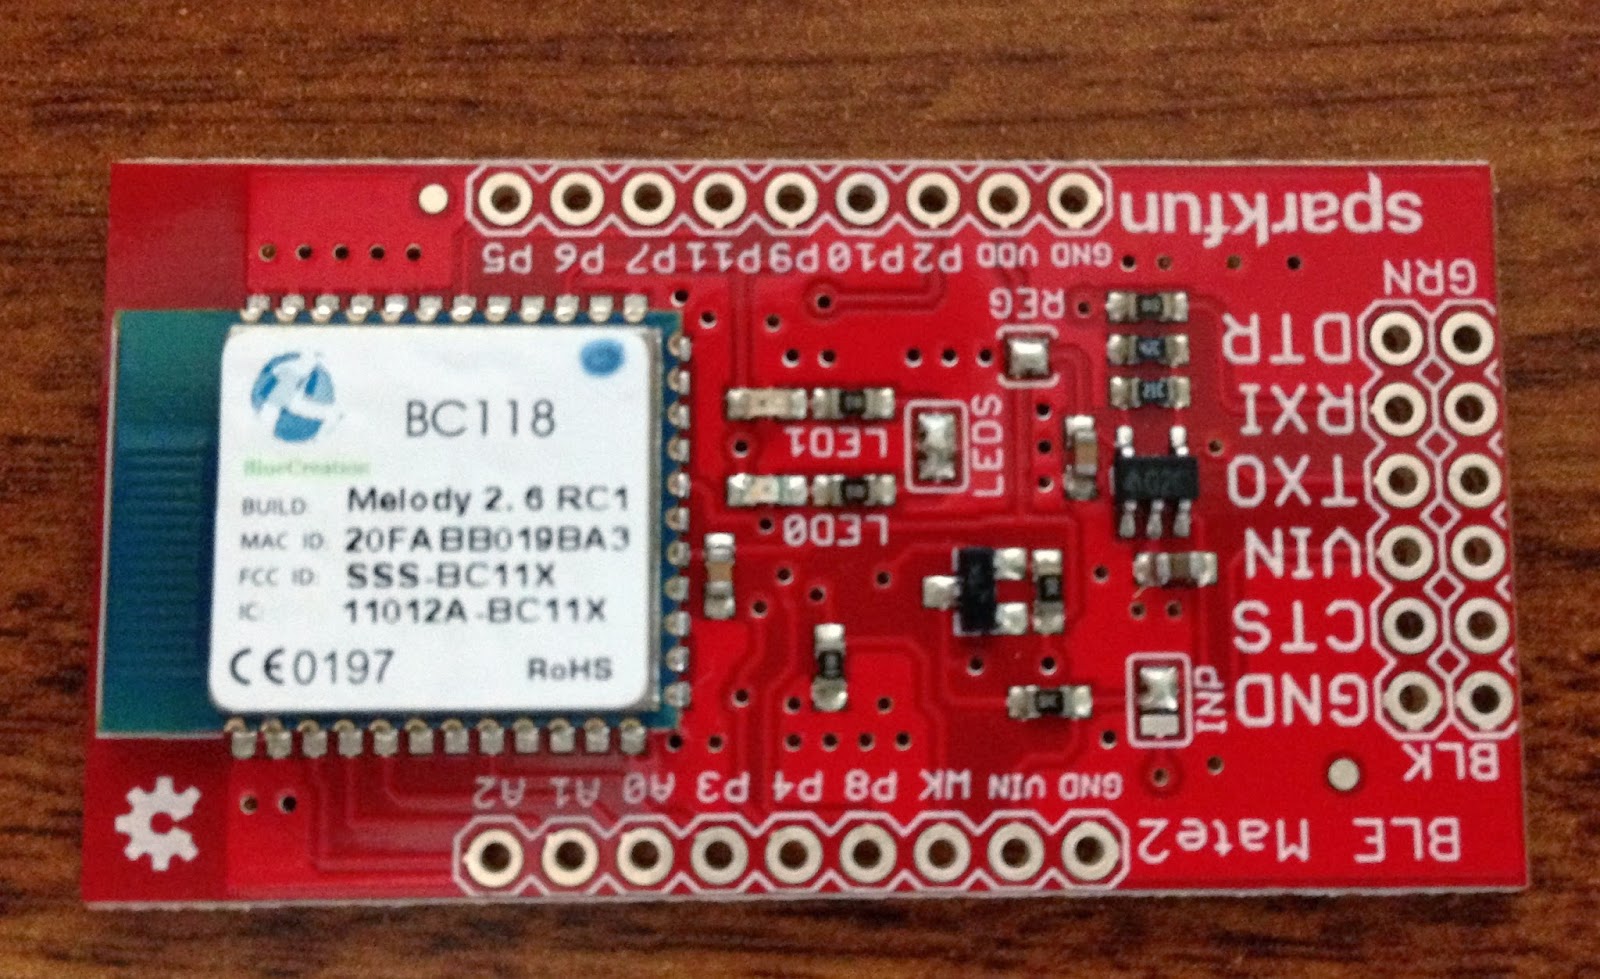
- Sparkfun Bluetooth Mate Gold
- Teensy 3.1
- A couple of discrete components so I can control the Bluetooth Mate

The Nano, like the RFDuino, can't run at 115k with the radio on, so I have to have the Teensy around to coordinate everything.
Cool thing with the nano, is I have it in Central Mode.  My CGMS devices pair directly with this if the phone isn't available.

So it's:
Sensor->CGMS->iPhone-> Watch

OR

Sensor->CGMS->"The new device"->Watch

Also this device will pair and/or wait to pair for as long as it has power.  No issues with something shutting down the "process" like the iPhone does if the BLE connection has been idle for more than a few minutes.

Thursday, December 10, 2015

More on Pebble

Connecting an Arduino to a Pebble.

I'm using a sparkfun, bluetooth mate, GOLD.  I don't believe the Silver will work.  A big issue with this process is what type of bluetooth dongle you have, I'm sure they all work differently.

The guy here: https://gist.github.com/southwolf/6365045, has some basic working(for him) code.  What's left out, is the initial pairing.  With the Mate, you are better off not trying to control it programatically.  After many hours, it just doesn't seem consistent and tends to be unresponsive.  It is meant to be configured over serial from a lengthy command set.  Most of the settings don't appear to "take" until you reboot the device, and just power cycling may blow them away.  Also, some important settings don't persist.  The big one that comes to mind is baudrate, so assume you are going to be at 115200.

Before you do anything with the arduino, configure the Mate, you aren't done until the Mate stops flashing red and the green light stays on, indicating you are paired.  From that point forward, the mate should automatically pair with the pebble until the end of time (although it may take as long as a minute, or never)...

The commands you should send to the Mate:
SF,1         //factory reset
SP,9999   //takes care of the pairing code
SM,6        //pairing
SA,4
SY,0000   //power
SW,0640  //sniff mode
R,1            //reset so settings are saved/active and pebble should ask to connect

Once the light hits green, pairing with the watch will take place, the first time the watch will ask, any time after that it will be silent.  The watch will send you a version request.  You need to send two packets in reply, screw this up and the watch will just ignore you.

I send:
//          //phone version
{0x00, 0x02, 0x00, 0x30, 0xff, 0x08};

Followed 100ms later with:
//                                  0x11 = 17 = Phone Version endpoint
//                                             phone version
//                                                        remote capabilities  Telephony.SMS.Android
//                                                                                              //session capabilities............
{0x00, 0x0d, 0x00, 0x11, 0x02, 0xff, 0xff, 0xff, 0xff, 0x80, 0x00, 0x00, 0x00, 0x00, 0x00, 0x00, 0x32};

You shouldn't send the above again, unless you "forget" the bluetooth device from your watch.

Once that's complete you can ping the watch:
//                    endpoint
//                    2001=ping
{0x00, 0x05, 0x07, 0xd1, 0x00, 0xde, 0xad, 0xbe, 0xef};

Send a notification:
//this says BG 115  
//                                                                       B      G                   1        1         5
 {0x00, 0x1A, 0x0B, 0xB8 , 0x01 , 0x02, 0x42, 0x47, 0x03 , 0x31 , 0x31 , 0x35, 0x11, 0xFF, 0xFF , 0xFF , 0xFF , 0xFF, 0xFF, 0xFF, 0xFF , 0xFF , 0xFF, 0xFF, 0xFF , 0xFF, 0xFF , 0xFF , 0xFF, 0xFF};

Note: the above packet has a header and body.  The header is 2 bytes and says "BG".  The body is 3 bytes and says "115".  The 0x11, signifies 17 bytes until the end of the message.

Or, and this is the big one, send an application message.
For this one you need the UUID of the app, which you can see in Cloud Pebble.

With that, I can send an integer value of 120 to the first element(tuple?) in my applications dictionary.
//app messages to uuid, glucoseKey
//001b 0030 0100 7f7a38901a1c43a3adf121449e4f352d 040100 0000 03:01:00:78
//msg  app    push UUID................................................... key                     len      120
//         msg                                                                                                int (0x03)
//                                                                                               dict element (0x01)

I may have to update this one.

Can't use the RFDuino.  Number of serial ports is one issue, the bigger one though is you can't run the Radio and Serial at 115200, 9600 works, but 115200 will cause the app to hang.

Turning one off and the other on, also doesn't work, doing a Serial.end / Serial.begin appears to glitch the serial line to the mate and causes it to disconnect.

It looks like this project will be continuing with a Teensy.  One serial for debug, the second for the Mate, SPI for the CC2500, maybe a third serial to run an RFDuino if I want BLE.


See github (https://github.com/brownedon/Arduino-to-Pebble) for a working sample.


Friday, December 4, 2015

Direct control of Pebble with Arduino

Slow week, and I was cleaning up the bench.  Stumbled on one of my Sparkfun Bluetooth Mates.
I used these with the metawatch a few years ago.  I was never able to work out the pairing to get these to connect to the Pebble.  Well, I know a bit more, and I'm probably even more persistent these days...


I need to work out how to send an application message, then I can go phoneless.  I might have to use the Wixel again, could keep my parts count down.  This will net me a larger carry, but no phone requirement for extended periods.  Still need to get calibrations in somewhere, though.

This guy (here) was close.  But he's leaving out the initial pairing step.  The packets have changed since this was published also.  Allot of strange details, probably bluetooth device dependent.  I'll post more when I can sort through all the details, but I can reliably pair with the watch and send a notification to it.

Monday, October 5, 2015

The final CC2500 Device

All this work on watches, and discussions about how small this device could be, got me motivated this weekend to make another (last) device.  This took the whole weekend.  Fiddling with eagle, realized I could do it without jumpers, and I left out the serial interface for programming.  Leaving out those traces makes a huge difference, no issues with trying to sneak by the CC2500 antenna.  Program the chip before installing...

Screenshot from eagle:


From the left:  Rfduino, CC2500, and a Polulu 5v to 3.3v converter.  Used a 40 maH lipo which fits on the top right.  I realized after the fact that I could make life easier on myself, and have dedicated pads for the lipo, that aren't so close too each other.  As it is, the lipo is directly soldered to the pin-header socket.

Completed device, in 3d printed ABS case.


It's almost bic lighter size.

A shot of the board, Dexcom for scale :)


And in it's charger base.


Saturday, September 19, 2015

Time for Pebble Time and Smart Straps

More goes on in the comments around here than the blog itself.  I've been thinking about smart straps for a while, but it was a question from someone that really got me going.  I've been hung up on the current limitation, but then I realized I can do this with just the RFDuino.  I still use the device I carry in my pocket, I only have to reflash it for "Gazelle" which allows RFDuino to RFDuino communication.  The watch now becomes the master device.  I'll still need an iPhone app, that will handle calibration, and push the Slope and Intercept values to the watch.  The phone will still receive glucose, but it will retrieve those values from the watch.


But, once I'm happy with the calibration, I won't need to have the phone around.  I like that.

And another idea, only a theory at this point, in the future I could use the Redbear BLE Nano, in central mode paired with the G5 transmitter (not sure I want this until I have to take it though).  This would make the bitter pill of living without Raw data, and forced calibrations, and 2 hour warm-ups easier to swallow.

Continuing on the BLE Nano topic, this device will imitate a BLE Smart Heart Rate Chest Strap.  Which means, if anyone has a decent looking wearable that has bluetooth smart HRM funcionality, you can make it a "CGMS".  Not allot out there, I was hoping the VivoSmart would do that, but it uses Ant+.  Amazing, that small wearable has both Ant+ and BLE in it.

Still trying to get Central mode communication working with the Vivo or the Pebble.  I can do it between the Nano and an RFDuino, which means Gap/Gatt is working.  Or at least that I know how to code it.  Using Mbed on the Nano, not Arduino.  The web based environment isn't half bad...  Need a way to automate the Hex file upload and the serial monitor.  I like the way it centralizes things, Pebbles development website does a great job at all of this.

Interesting thing with the pebble, it appears to use both Bluetooth and BLE.  When un-paired, it doesn't advertise, like a BLE device should.  I can't get a handle on it with a sniffer.  Kind of a show stopper, hence the new hardware approach.  I welcome comments if anyone knows how Pebble does it's BLE.

Still trying to sniff traffic between the Vivo and the iPhone.  More on that I'm sure.  The goal of today's blog is to make the Phone optional, ie. only for calibration.  I want to communicate with a wearable directly, like I used to with the MetaWatch (moment of silence).

Scheming about making a wearable, maybe carving up the Fuel and using the good parts.  Spending an inordinate amount of time with the 3D printer making it work with Ninja Flex.  Printing Octopi, obligatory photo:


Monday, August 17, 2015

Update

Made Dangerous Prototypes last month...

Finally, moved the iOS application to 8.4.  Been stuck on 8.2 since compiling on 8.3 broke btle re-connect.  Follow that?

Confiscated my wife's iPhone, booted into Mac mode, waited around a couple of hours for various updates, then struggled with xCode for another hour or so until it was convinced I really should be allowed to compile an application...  And then success.  So, I was able to fix a couple of alert bugs that I've been living with for months.  Also added more vibration alerts(to the iPhone) since I'm using the VivoSmart more these days.

xCode on the MacBook is all setup, so I won't need to dual-boot my desktop any longer, will make it easier for some future changes.

Old Sensors


This is a 14 day old sensor, they either fall off or get erratic at this point.  This is raw data, on the Dexcom you might get the "dips" smoothed out, or you'd get ???.  My pebble adds a question mark to the display at this point also.  When I saw the "80" plunge, I replaced it.

Next

Picked up a Nike Fuel Band.  I mentioned in a previous post that someone has thoroughly hacked them.  Now they are discontinued and available for $50.  They are nearly identical in size to the VivoSmart.  Functionality wise, they're junk.  But, they have a large and bright display area, supposedly you can send a bitmap to it.  So this is on deck, I like the VivoSmart but I can't read it in bright sun, also the font is getting too small for me to read.

First I'll start with an iPhone app, the original post has Android code on github.  Then once I have a better understanding of how all this works, I'd like to move it to something arduino related, implement btle central, and have the ability to ditch the iPhone for periods of time.  So yeah, Nike Fuel Band to Arduino(ish) communication.

I'm hoping I can get my head around bluetooth central enough that I can crack the VivoSmart and the Pebble.

Thursday, April 30, 2015

Building a CC2500 to BLE Adaptor

Posting some details in response to questions about the current module.  Everything for the CC2500 is on Github, https://github.com/brownedon/CC2500-Project.  Fish around here and you'll also find some iOS and Pebble code.  Sorry, nothing Android based.  

The RFDuino is programmed like any other Arduino, it's worthwhile to use their usb shield.  The CC2500 is controlled via SPI(from the RFDuino), there's nothing to program.


The schematic is missing the 3 volt regulator (Pololu), and the battery for that matter.  I just added pads for it into the PCB, I don't spend much time in Eagle, so it's a painful experience.  One jumper in this version, from the CC2500 VCC to +3, you'll see the pads in the middle.  Also, I've added a 100 micro farad electrolytic capacitor across the +/- leads.  The device tends to crash when you plug it into the charger, the Cap reduces this (maybe).  Not really a big deal, since all this does is relay what the CC2500 receives to the iPhone.  

Everything is surface mounted, whether it should be or not.  Keeps the board thin, and drilling is a pain.  The device is always on, makes for some fear when soldering the lipo, YMMV.

Still considering going thinner by using a smaller battery and recessing it into the board.  But, we're talking about a 0.1" improvement.  Battery life with a 110 mAh lipo is about 48 hours.

Friday, March 13, 2015

Healthkit

I was curious about all the recent hype about apple and CGMS data.  I noticed a while back that healthkit had hooks for Glucose, although it disappeared from the api for a period of time.

Finally, the 8.2 release has it.  Here's this morning:


So, first impression, the graph is basically, useless.  Upper line is 300, middle line is 110?
I thought I could zoom in on the points by double tapping, nope.  And the time scale is fixed, 12-12.

A potential positive here, all I needed was an app writing glucose values to healthkit.  Theoretically, any other app should be able to subscribe to that data with the Users permission.  That could be major, real time access to your data from any approved iOS application.

So we might see a proliferation of iOS apps that handle CGMS data in some capacity, certainly something better than what's above.

On another note, the new model died after 2 months.  First of my devices to malfunction.  Probably due to the wire wrap wire, jumpers that I used.  Redesigned the board, with only two jumpers, and relocated the connection points to where they are easier to access.  Routed the slot for the crystal, "carefully" this time, and relocated some of the traces so I wouldn't be cutting them...
Top trace isn't so pretty, I had to touch that up with a sharpie before etching.


On the XCode side, upgraded to whatever version supports 8.2.  Found that breaks the ability of my iOS app to reconnect BLE from the background.  I spent allot of time getting that to work.  Luckily, recompiling my app as 8.1 appears to solve that issue(for now), until I figure out how the code is supposed to work.  

Finally, it's easy enough to write data to healthkit, if you start with the Heart Rate example.  The tricky part is getting the units correct.  The closest unit of measurement you can choose is g/L.  If you're using mg/dl, you'll need to divide that value by 100 before writing to healthkit.  

Sunday, March 1, 2015

A Start at some BLE hacking

I've been feeling a need to have a better understanding of what these BLE devices are doing.  I would like to get back to having the iPhone as optional for my setup.  This means I need to understand the BLE Central role, and the packets these various devices are exchanging, so that I can duplicate them with a low level device, namely an arduino.

So, I fired up a Raspberry PI, I seem to have a few lying around these days.  Oh, it has a bluetooth dongle plugged into it.

pi@raspberrypi ~ $ sudo hcitool lescan>scan.txt
pi@raspberrypi ~ $ cat scan.txt|sort -u

5C:F9:38:C1:2E:02 (unknown)
CE:8E:1A:16:CE:2F CGMS MICRO1
FF:E8:16:98:EE:BA (unknown)

Shows me 3 BLE devices.  The CGMS one is an RFDuino.  I turn off a pebble and the "FF" one vanishes.  Interesting, that's not what I thought was the pebbles MAC address.

Now, I turn off bluetooth on my iPhone.  These two show up:
CE:8E:1A:16:CE:2F CGMS MICRO1
E9:7F:13:9D:90:53 vivosmart #3895410566

I really want to poke at the Vivo, but I have no clue what it wants.  Right now, I can only get it to tell me that I can't connect.
I'll stick to the RFDuino for now since I have full control of it.  

sudo gatttool -t random --primary -b CE:8E:1A:16:CE:2F –I

Note the "random".  Spent a couple of hours getting the new version of gatttool onto the PI for this.  It's a security feature, and most BLE devices require it, RFDuino being one.

Then:

> char-desc
handle: 0x0001, uuid: 00002800-0000-1000-8000-00805f9b34fb
handle: 0x0002, uuid: 00002803-0000-1000-8000-00805f9b34fb
handle: 0x0003, uuid: 00002a00-0000-1000-8000-00805f9b34fb
handle: 0x0004, uuid: 00002803-0000-1000-8000-00805f9b34fb
handle: 0x0005, uuid: 00002a01-0000-1000-8000-00805f9b34fb
handle: 0x0006, uuid: 00002803-0000-1000-8000-00805f9b34fb
handle: 0x0007, uuid: 00002a04-0000-1000-8000-00805f9b34fb
handle: 0x0008, uuid: 00002800-0000-1000-8000-00805f9b34fb
handle: 0x0009, uuid: 00002803-0000-1000-8000-00805f9b34fb
handle: 0x000a, uuid: 00002a05-0000-1000-8000-00805f9b34fb
handle: 0x000b, uuid: 00002902-0000-1000-8000-00805f9b34fb
handle: 0x000c, uuid: 00002800-0000-1000-8000-00805f9b34fb
handle: 0x000d, uuid: 00002803-0000-1000-8000-00805f9b34fb
handle: 0x000e, uuid: 00002221-0000-1000-8000-00805f9b34fb
handle: 0x000f, uuid: 00002902-0000-1000-8000-00805f9b34fb
handle: 0x0010, uuid: 00002803-0000-1000-8000-00805f9b34fb
handle: 0x0011, uuid: 00002222-0000-1000-8000-00805f9b34fb

This is the Write attribute, so lets write something
[CE:8E:1A:16:CE:2F][LE]> char-write-req 0x0011 ff02ff0344

RFDuino serial terminal app shows:
RFduinoBLE_onReceive (this is an interrupt I have coded)
FF:2:FF:3:44:  (this is what the RFDuino just received)

You can also read the other attributes above, like:
>[CE:8E:1A:16:CE:2F][LE]> char-read-hnd 0x002
Characteristic value/descriptor: 0a 03 00 00 2a

I think this one was the Manufacturer name.

At this point, I realize I'm not going to get any further from Unix.  I need to order the Ubertooth from Sparkfun so I can do some serious packet sniffing.


Monday, February 16, 2015

Vivosmart as CGMS

I went to the store this weekend to get the Nike Fuel, but they didn't have it.  I bought the Garmin Vivosmart instead.  The picture could be better, it was nearly impossible to photograph the display.


I took a chance that I could get BG data onto it in a usable way.  To do this I'm just sending a notification from the iPhone.  Three taps whenever you want to see your BG.  The only negative is I can't control the buzzing(when the notification is received), other than to turn it off.

This is the perfect device for the gym.  The watch is too bulky, and potentially dangerous to other people, and of course, people wonder why you are wearing it in the first place.  Lots of people are wearing trackers these days, it's low profile, all rounded edges and it's just black plastic until you tap it.  Have I mentioned the time someone asked me if my HR was really 185? ...

From the iPhone you configure it to only keep 1 notification, so the new one always overwrites the last.  On the Vivo, there's a privacy setting where you turn alerts off, if you leave it on, you'll get a brief buzz every 5 minutes.  If that option could be configurable by app, I could get this to do alerts.  But, as it stands, it's all or none.

Saturday, January 31, 2015

Somewhat broken...

I flashed a couple of changes to the device during the week.  Somewhere in that time I lost most of the sensitivity.  Call me paranoid but I suspect there are some undocumented features at work here, such as:
- CC2500 needs a power cycle to reset it ? (Like blue smirf)
- Library changes don't always get picked up by Arduino (like Wixel)

I had RSSI in the -50's, now they're in the -70's.

Originally I had the bare minimum for register settings, then I slowly added additional ones.  Living life in 5 minute increments.  Biggest improvement was setting the bandwidth slightly below the 335 khz that Dexcom wants.  RFStudio will choose a value of 400 khz, the other increment available is 325.  325 made a huge difference.

So, I'm back to the minimum and testing one value at a time.

On another note, I bought one of these:


This will allow me to experiment with Central role BTLE.  And, someone has cracked the Nike Fuel band, See->http://hackaday.com/2015/01/30/hacking-the-nike-fuelband/

This might make a good display device, and it appears to take a bitmap for that display, like the MetaWatch.  So maybe, we can talk directly to it and leave the Phone at home.

News alert, RSSI's back in the 60's, just by changing the "TEST" registers.  Isn't that great, if you call something "TEST", should it have any real purpose? Noooooo.  Thank you TI.

Almost time to head to the gym to hit people.  My best test environment.  Something there shuts down the Dexcom (antenna symbol) and my custom devices.

Saturday, January 17, 2015

Finishing this one up

Printed case view from the slicer.  I got lucky today, I was able to change the filament without having to disassemble the print head, small miracle.


Theory is, these will slide together and I'll add a little hot glue to hold it all together.  Real close to encasing this one in epoxy, but I'd like to find a way to cut down on static first.

Assembling the PCB didn't go quite as well as I'd hoped.  The CC2500 has a large(ish) crystal on the back (this is how they can sell for <$5).  I had to carve out a hole in the board, which required I add another jumper.  I knew I was going to route a slot, I just didn't realize how large it was going to end up being.


Here's a view of the completed board, with the separate lipo charger.  I usually mount the lipo unit on the same board, but I realized I could get this one really small if I did without.

Here's a view of the carving on the back of the board to allow the CC2500 to sit flush.


The CC2500 didn't work initially either.  I had to reheat all the connections, and the ones on the RFDuino.  Then I used a solder wick to remove excess solder.  After a few rounds, everything was working.  This just goes with the territory when you're hand soldering surface mount components.
I have an electric frying pan and solder paste, I may give that a try next.

And finally, most of my models since last January.


Friday, January 16, 2015

Thin is in


Test layout of parts on new PCB design.  This will be the first without a wixel.
Finished thickness should be 0.45" including case.  As I'm typing this, I realize I can get down to 0.4" if I do a cutout for the battery.   Finally gets me thinner than the dexcom, which is 0.5".

Kills me to have to leave a header on the board for programming and charging, could cut 0.4" off the length if I could do something different.  

This will be very pocket friendly.